💻 만드려고 하는 부분
요즘 GPT로 그림 일기를 만드는 프로젝트를 제작중인데,
완성된 그림 일기 화면을 캡처해서, 인스타 공유 / 앨범에 저장 기능을 만드려고 한다
Html2Canvas 설치 후 적용하기
찾아보니 Html2Canvas 라이브러리를 활용해 간단히 화면 속 영역을 이미지로 바꿀 수 있길래 Html2Canvas를 사용하였다
html2canvas
Screenshots with JavaScript. Latest version: 1.4.1, last published: 2 years ago. Start using html2canvas in your project by running `npm i html2canvas`. There are 2405 other projects in the npm registry using html2canvas.
www.npmjs.com
.
📌 Html2Canvas 설치
npm install html2canvasyarn add html2canvas
📌 import
import html2canvas from "html2canvas";💡 프로젝트 코드에 적용
  const onClickDownloadButton = () => {
    const target = document.getElementById("download");
    if (!target) {
      return alert("사진 저장에 실패했습니다.");
    }
    html2canvas(target).then((canvas) => {
      const link = document.createElement("a");
      document.body.appendChild(link);
      link.href = canvas.toDataURL("image/png");
      link.download = "Haru4cut.png"; // 다운로드 이미지 파일 이름
      link.click();
      document.body.removeChild(link);
    });
  };
- html에서 id가 "download"인 부분을 찾아서 캡처하는 코드
- download 요소가 없으면 "사진 저장에 실패했습니다."라는 경고 토스트 메시지 출력
- html2canvas 라이브러리를 사용하여 target 요소를 캡처
- 캡처된 이미지를 데이터 url로 변환해서 <a> 태그의 href 속성에 할당되어서 클릭했을 때 이미지를 다운로드하도록 함
return (
<MainWrap>
<DownWrap id="download">
<LogoWrap>
<Logo>Haru4cut</Logo>
<LogoUnderLine />
<div>내 하루를 네컷으로 기록하세요</div>
</LogoWrap>
<TodaysDiaryWrap>
<Date>{moment(date).format("YY.MM.DD")}</Date>
<Todays4CutDiary>오늘의 네컷일기</Todays4CutDiary>
<ImgWrap>
{DiaryImgList.map((imgUrl, index) => (
<>
<DiaryImage src={imgUrl} alt="하루네컷 이미지" />
</>
))}
</ImgWrap>
<TextWrap>{Text}</TextWrap>
</TodaysDiaryWrap>
</DownWrap>
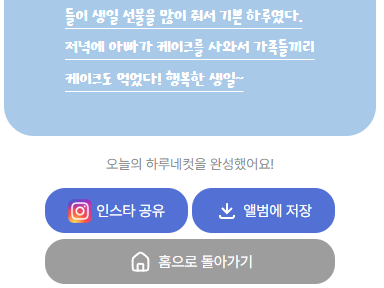
<div>오늘의 하루네컷을 완성했어요!</div>
<DownloadButtonWrap>
<Button width="143px" onClick={onClickShareButton}>
<Icon src={InstaLogo} />
인스타 공유
</Button>
<Button width="143px" onClick={onClickDownloadButton}>
<Icon src={DownloadIcon} />
앨범에 저장
</Button>
</DownloadButtonWrap>
<Button backgroundColor="#9D9D9D" marginBottom="20px">
<Icon src={HomeIcon} marginBottom="3px" />
홈으로 돌아가기
</Button>
</MainWrap>
);
}
- div에 id="download"를 추가
- 버튼을 눌렀을 때, onClcikShareButton 함수가 실행되도록 함
🎥 구현 영상
앨범에 저장 버튼을 누르면 지정된 영역 부분의 사진이 저장되는 모습을 확인할 수 있다-!
📌 참고 링크
html2canvas — does not render images located in the element
I use html2canvas to take the screen shot of the html element but it didn’t capture the image in the screen shot. Here is what I find on…
medium.com
[React] 화면(DOM) 캡쳐 및 저장 기능 구현하기 (feat. html2canvas, file-saver)
📖 들어가며 React에서 화면 (DOM)를 캡처, 저장하는 기능에 대해서 알아보려 합니다. 작은 토이 프로젝트를 하면서 여러가지 문제를 맞이 했었는데, 결과적으로 성공한 방법들로 포스팅하게 됩니
yong-nyong.tistory.com
'개발공부 > REACT' 카테고리의 다른 글
| [React] 렌더링이 두 번 발생하는 이유 _ React.StrictMode (2) | 2024.06.18 |
|---|---|
| [React] Axios 인스턴스 - 헤더에 acessToken 넣기 (1) | 2024.06.17 |
| [React] 리뷰 - 별점 기능 만들기 (1) | 2024.01.28 |
| [React] API의 정의, 장/단점, API 사용하기 _ JSON, fetch 함수 (1) | 2023.11.25 |
| [React] 사진 더보기 접기 기능, 그라데이션 적용 (1) | 2023.08.11 |


